Do you write eBooks? How-to guides? Digital comics or art books? If you create e-publications, you’ve probably already looked at selling them through fancy online stores or third-party services. What you may not realise is how easily you could be selling them from your WordPress site – using nothing but a free plugin and your existing Business or Premier PayPal account.
Sounds good? Then read on! This tutorial will show you how to set up a PayPal “Buy Now” button on your WordPress site, list your PDFs or other files for sale, and provide customers with a download link automatically after they purchase. Best of all, you won’t need a detailed knowledge of WordPress’s inner workings – just how to write posts and include pictures.
Step 1: Install the PayPal for Digital Goods plugin
To start selling your files, you’ll need the free PayPal for Digital Goods plugin. Open your WordPress dashboard and, from the ‘Plugins’ menu, select ‘Add New’.
- If you have downloaded the plugin as a zip file, click ‘Upload Plugin’ and locate the file on your computer.
- If you don’t have the zip file, enter “PayPal for Digital Goods” into the ‘Search Plugins’ field, then click the ‘Install Now’ button when you see the plugin displayed.
WordPress will prompt you to activate the plugin after installing.
Step 2: Install the PayPal for Digital Goods plugin
On the ‘Settings’ menu of your dashboard, you can now select ‘PayPal for Digital Goods’. If you want to change the currency code or text on your “Buy Now” button, you can set whatever you like here. You will be able to override this for individual items, so don’t worry about it too much.
Unless you have a PayPal developer account you’re using the test your setup, you’ll also need to check the “Live Mode” box (so your transactions actually process!).
Step 3: Connect your PayPal account
Next you will need to acquire credentials to link the plugin to your PayPal account. You can find a detailed guide on the PayPal Developer site, but we’ll step through it here as well:

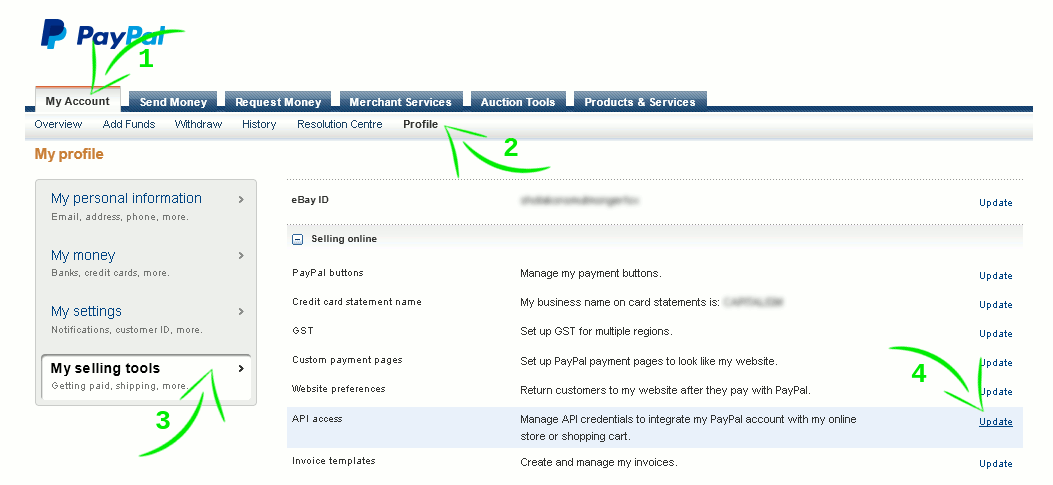
- Log in to your Paypal account and, from the ‘My Account’ menu, select ‘Profile’.
- In the sidebar, click on “My Selling Tools”.
- Under ‘Selling Online’ locate ‘API access’ and click ‘Update’.
- You will be shown two options for setting up API access. Select the link at the bottom of Option 2.
- You will be able to choose between an API Signature and an API Certificate. For this plugin, you need to select ‘Signature’.
- Click ‘Agree and Submit’ to receive your API credentials.
Now you can copy and paste the API Username, API Password and API Signature into their matching fields in the plugin settings.
Step 4: Upload your files
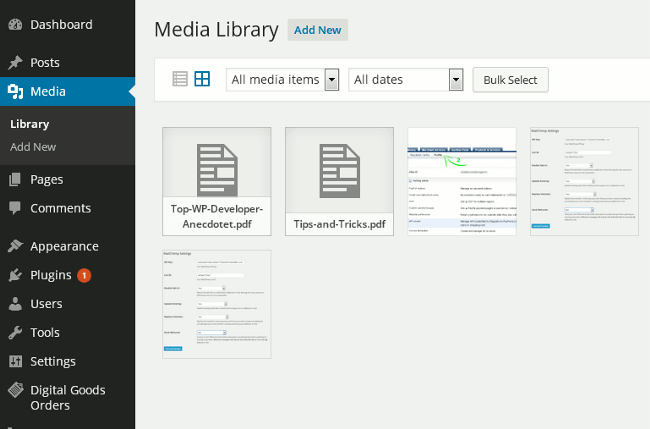
If you haven’t already done so, now is the time to upload the files you want to sell. If you’ve ever used the WordPress Media uploader, then you already know everything you need. If you haven’t, it’s still very simple! Just open the Media section from your WordPress dashboard. Then click ‘Select Files’ and locate the files on your computer – or drag-and-drop your files into the highlighted area, if you prefer.

Of course, if you want to sell files that are already uploaded to your WordPress site, you don’t need to upload them again.
Step 5: Make a “Buy Now” button
Now it’s time to make your files available for purchase. All you need to do is add a “Buy Now” button for each item you want to sell. The plugin is very versatile – you can place your buttons in posts, pages, sidebars – anywhere on your site where you can put a shortcode. Designing your shopfront is up to you!
For now, we’re going to make a single Page to be our “store”, where we can list lots of sellable items. Create a new Page in WordPress, and name it however you like. In the body of the page, add the shortcode that creates the “Buy Now” button:
[paypal_for_digital_goods item="My eBook" price="25" url="http://your-domain.com/my-ebook-file.zip" button_text="Buy Now"]
Of course you’ll need to replace some of the text above to get your button working properly (but don’t delete those quote marks)! Replace “My eBook” with the title of your book, adjust the price to your chosen amount. You only need to include the “button_text” property if you want this button to use custom text – if you leave out that part, your button will show whatever default text you set on the plugin settings page.
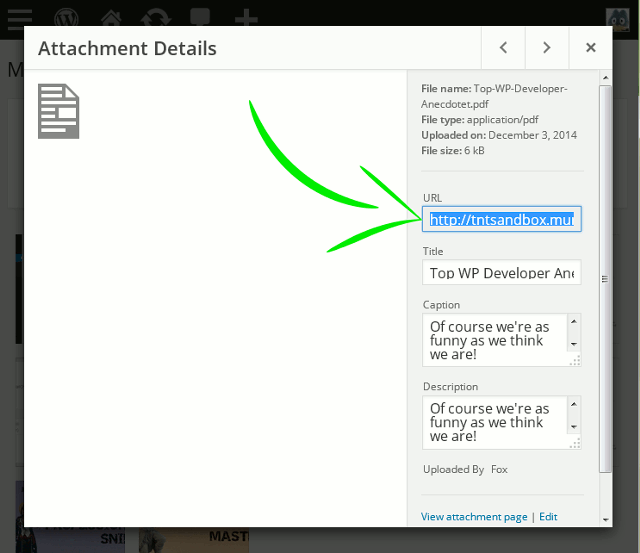
Finally, in the Media Library, select the file you want to sell and copy the file URL from its details page, replacing the example URL above.

Preview the page, and you should see the short code has changed into a working “Buy Now” button!
Step 6: Add the details
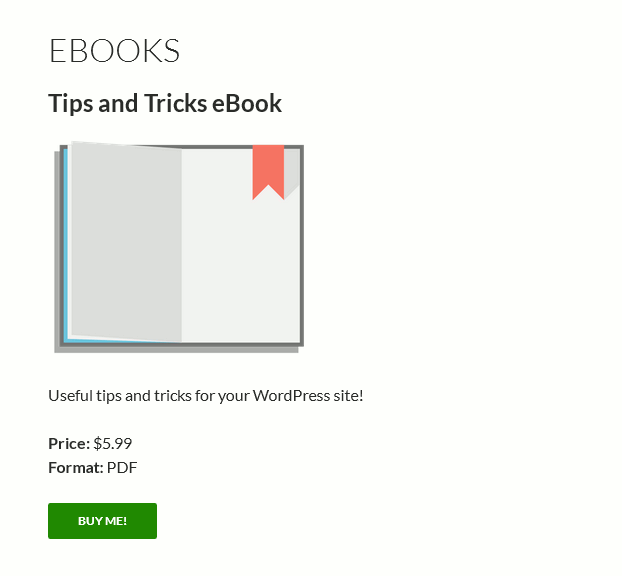
Of course, that button isn’t doing much on its own – the customer doesn’t even know what they’re buying! You’ll need to add some information if you want your store to look like it means business. Fortunately, that’s no different from writing a normal post – just add headings, pictures and descriptions like you normally would.

As you can probably tell, presentation is limited only by what you can create!
Hi,
I would just like to know; if I were to sell e-books on behalf of a publisher on my WordPress website, and we are thinking about a profit split, can this process be tracked and the commission of for example 10% be credited to my account while the other 90% be credited to the publisher immediately once a purchase has been made on my platform?
Also, is there an easy way to digitilize physical books so we can help other publishers sell more books online?
Appreciate the help!
Thanks.
-Sophia